In this tutorial you will learn just how easy it is to make gorgeous bias stems for appliqué.
The finished stems will give you the same look and feel of needle-turn appliqué stems but so much quicker and easier. When ironing or pressing Whisperlite use a medium setting on your iron.
Here we go..... there's a lot of pictures because I don't want to leave anything out that will help you be successful.
You will need;
Fabric
Whisperlite foundation
#2 pencil or Frixion pen
4" (or 6") x 24” long acrylic ruler
rotary cutter and mat
Pins
Thread to match fabric
Sewing machine
Turn- It-All tool
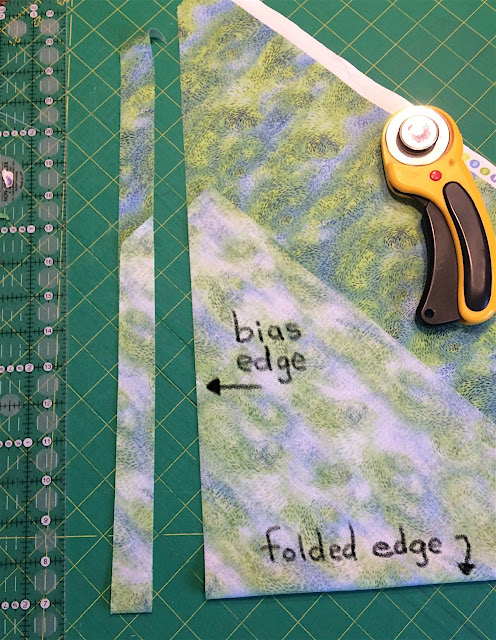
In this tutorial I am using a fat quarter of fabric and we will be making beautiful 1/4" bias stems. Begin by finding the 45 degree line on your ruler and line it up with one edge of your fabric. Cut the fabric on a 45 degree angle as shown below. Cutting the fabric on the bias allows you to make smooth curves with your bias stems.
Next, line up the 1" mark on your ruler with the bias edge you just made on your fabric. Cut a 1" bias strip. continue cutting strips as needed.
When your fabric is too long for your ruler to reach all the way across, fold the fabric with the bias edges lined up and continue cutting.
Next, take a piece of Whisperlite tracer/foundation and draw lines 3/8" apart using a #2 pencil or a frixion pen. (Frixion pen marks disappear with heat.) The length of the fabric strips and Whisperlite strips will depend on the needs of your particular project.
Continue drawing lines with a 3/4" space between sets. Cut apart between line pairs using your rotary cutter or scissors. You don't have to be super accurate here.
Place a strip of the Whisperlite onto the RIGHT side of a bias fabric strip and pin. The beauty of using Whisperlite foundation to create our turned edge bias stems is that using Whisperlite greatly reduces the bulk and allows for a nice little stem.....you'll soon see.
Using your sewing machine and thread to match your fabric (I'm using black here so it shows up better) stitch directly on the pencil lines, down one side, across one end, and up the other side. Leave one end open. Backstitch at beginning and end. OMG, I need to dust my foot off!
Trim the outside seam allowances to a scant 1/8"
Now here comes the rest of the magic.... This is the Turn-It-All Tool
and it's fabulous. And like Whisperlite it's made in the U.S.A. The tool allows you to turn fabric tubes right side out. The tool set contains 3 sizes but for the little 1/4" stems we're making today we will be using the small red tube and the small metal rod.
Insert the small red tube into the open end of your bias stem.
Push the tube all the way to the sewn end of the tube.
Take the small metal rod and push it against the sewn end of the tube. Make sure you are catching the fabric and not the Whisperlite with the end of the rod or the rod will poke through the Whisperlite and prevent you from turning the tube.
Keep pressure on the rod against the end of the tube and slide the fabric tube onto the rod. Keep going until the sewn end peaks out. You can then set the red tube aside and just keep sliding the fabric over the rod and before you know it you'll have a beautiful turned edge bias stem for your applique.
Ta-Da! now simply stitch your turned edge bias stem in place by hand or machine. This picture shows the right side of the finished stem.
This picture shows the backside of the turned edge bias stem. You can see the Whisperlite and the scant seam allowance encased within.
I truly hope you enjoyed this tutorial and found it helpful in your quilt making journey.
Check out the other tutorials here on my blog and thanks for visiting.
Linda


No comments:
Post a Comment